1.云计算概述 云计算是一个资源池,它为我们提供了诸如水、电、煤气一样的基础服务。
云计算是一种按使用量付费的模式,这种模式可以快速、高效地提供网络,服务器,存储,应用软件,服务等,我们不必关心如何实现,所以只需投入很少的管理工作,只需和服务供应商进行很少的交互。
云计算从广义上可以分为如下几种模式:IaaS(基础设施即服务)、PaaS(平台即服务)、SaaS(软件即服务)
IaaS Amazon、阿里云、腾讯云提供的云主机即IaaS,我们拿到的是一台机器,可以自定义操作系统。
PaaS 面向开发者,直接给用户提供一个平台来运行用户的程序,早期的idc服务商卖的主机、新浪的sae、阿里云的云数据库等。
SaaS 卖的是服务,比如腾讯企业邮箱、印象笔记等
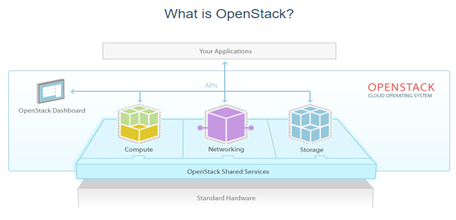
2.openstack 简介 openstack是目前比较流行的一个实现云计算平台的项目,官网
由NASA(美国国家航空航天局)和Rackspace合作研发并发起的,以Apache许可证授权的自由软件和开放源代码项目,用python语言开发,可以实现私有云或者公有云
主要有三个最基础组件:计算服务、网络服务、存储服务
发布版本 http://releases.openstack.org/,目前稳定版本为Liberty
6个核心服务:nova(计算中心,对比阿里云的ESC,支持kvm,xen等虚拟化技术)、keystone(认证中心)、neutron(网络服务中心)、swift(对象存储服务,存储图片,附件等文件,对比腾讯云的COS)、cinder(块存储服务,云盘)、glance(镜像管理中心)
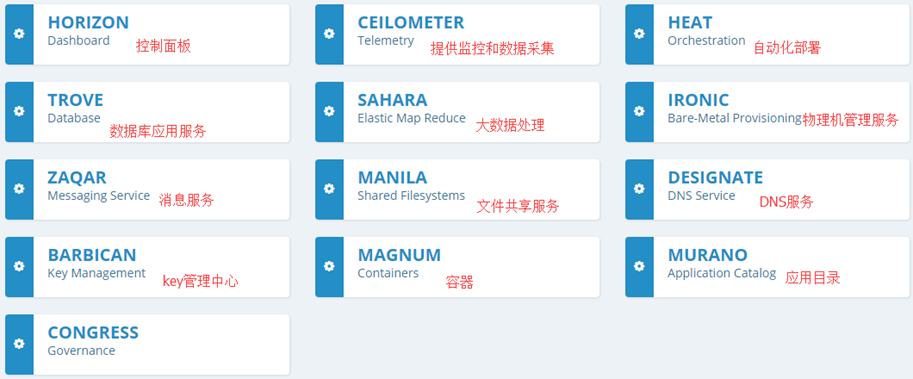
openstack其他可选组件:
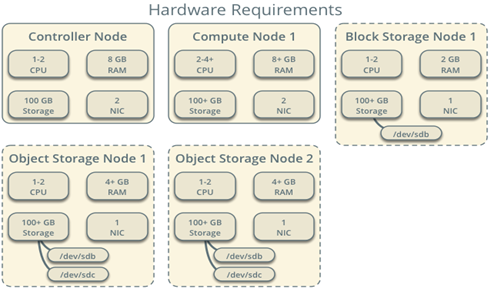
实验环境:至少两台机器。
Controller Node: 1 processor, 2 GB memory, and 5 GB storage
Compute Node: 1 processor, 2 GB memory, and 10 GB storage
生产环境硬件要求:
3.前期准备 在RHEL7/CentOS7上安装openstack liberty
官方文档
两台虚拟机,安装centos7系统(准备两个网卡,一个NAT,另一个仅主机)
nat网卡设置ip,可以联网,仅主机的网卡只要我们windows可以通就行,主要是用远程连接工具远程连接的,如果登录很慢。则修改
修改为
重启设置
关闭selinux
1
2
[root@controller ~]
[root@controller ~]
关闭iptables
1
2
3
4
[root@controller ~]
[root@controller ~]
Removed symlink /etc/systemd/system/dbus-org.fedoraproject.FirewallD1.service.
Removed symlink /etc/systemd/system/basic.target.wants/firewalld.service.
关闭NetworkManager
1
2
3
4
5
[root@controller ~]
[root@controller ~]
Removed symlink /etc/systemd/system/multi-user.target.wants/NetworkManager.service.
Removed symlink /etc/systemd/system/dbus-org.freedesktop.NetworkManager.service.
Removed symlink /etc/systemd/system/dbus-org.freedesktop.nm-dispatcher.service.
centos7 配置iptables CentOS 7 下使用iptables
定义密码 在部署openstack过程中会在多个地方使用到密码,为了方便管理和安全设置,我们需要提前先定义好密码,使用命令mkpasswd -s 0生成随机字符串,没有 mkpasswd先安装
1
2
3
4
5
6
7
8
9
10
11
12
13
14
15
16
17
18
19
20
21
Database password (no variable used) Root password for the database tn1Pi6Ytm
ADMIN_PASS Password of user admin 3qiVpzU2x
CEILOMETER_DBPASS Database password for the Telemetry service Czn3bF1hm
CEILOMETER_PASS Password of Telemetry service user ceilometer abquh12GU
CINDER_DBPASS Database password for the Block Storage service O3bwbpoZ3
CINDER_PASS Password of Block Storage service user cinder hf8LX9bow
DASH_DBPASS Database password for the dashboard 5qBZxnn1g
DEMO_PASS Password of user demo 9TtbgaA1q
GLANCE_DBPASS Database password for Image service Zznky4tP0
GLANCE_PASS Password of Image service user glance Wuyaf4cV6
HEAT_DBPASS Database password for the Orchestration service b7Fk5wjLg
HEAT_DOMAIN_PASS Password of Orchestration domain 7Gotb3eoH
HEAT_PASS Password of Orchestration service user heat eqQ2jLgz0
KEYSTONE_DBPASS Database password of Identity service f6zx0gURv
NEUTRON_DBPASS Database password for the Networking service quidyOC50
NEUTRON_PASS Password of Networking service user neutron mdcGVl29i
NOVA_DBPASS Database password for Compute service RYgv0rg7p
NOVA_PASS Password of Compute service user nova hsSNsqc43
RABBIT_PASS Password of user guest of RabbitMQ o3NXovnz5
SWIFT_PASS Password of Object Storage service user swift 6ci5xWOdk
METADATA_SECRET m8uhmQTu2
两台机器,设置hostname
两台机器分别修改为 controller、compute。
1
2
hostnamectl set -hostname controller
hostnamectl set -hostname compute
编辑/etc/hosts:
添加
1
2
192.168.1.99 controller
192.168.1.98 compute
controller上: 增加或更改:
保存后,执行
1
2
[root@controller ~]
[root@controller ~]
查看是否启动
1
2
3
[root@controller ~]
chrony 26153 0.0 0.0 100636 1540 ? S 13:45 0:00 /usr/sbin/chronyd
root 26359 0.0 0.0 112664 972 pts/0 S+ 14:18 0:00 grep --color=auto chrony
compute上: 增加或更改:
1
server controller iburst
改为
保存后,执行
1
2
[root@compute ~]
[root@compute ~]
同样查看是否启动
1
2
3
[root@compute ~]
chrony 25948 0.0 0.0 100636 1540 ? S 14:20 0:00 /usr/sbin/chronyd
root 26009 0.0 0.0 112664 972 pts/0 R+ 14:28 0:00 grep --color=auto chrony
4.配置 yum 和更新 安装openstack的yum源(两个机器上都操作)
升级所有的包(两个机器上都操作)
结束后重启系统
安装openstack 客户端和openstack-selinux
5.安装 sql 和 rabiitmq 服务 编辑配置文件 vim /etc/my.cnf.d/mariadb_openstack.cnf 加入下面内容
1
2
3
4
5
6
7
[mysqld]
bind -address = 192.168.1.99
default-storage-engine = innodb
innodb_file_per_table
collation-server = utf8_general_ci
init-connect = 'SET NAMES utf8'
character-set-server = utf8
启动mariadb:
1
2
3
[root@controller ~]
Created symlink from /etc/systemd/system/multi-user.target.wants/mariadb.service to /usr/lib/systemd/system/mariadb.service.
[root@controller ~]
安全配置,设置root密码
设置root密码为 tn1Pi6Ytm
测试密码是否正常登录
1
2
3
4
5
6
7
8
9
10
[root@controller ~]
Welcome to the MariaDB monitor. Commands end with ; or \g.
Your MariaDB connection id is 10
Server version: 10.1.18-MariaDB MariaDB Server
Copyright (c) 2000, 2016, Oracle, MariaDB Corporation Ab and others.
Type 'help;' or '\h' for help . Type '\c' to clear the current input statement.
MariaDB [(none)]>
安装 nosql nosql数据库被Telemetry service用到
在这里我们安装的是mongodb
编辑配置文件
更改如下配置
1
2
bind_ip = 192.168.16.111
smallfiles = true
改为
改为
启动服务
1
2
3
[root@controller ~]
Created symlink from /etc/systemd/system/multi-user.target.wants/mongod.service to /usr/lib/systemd/system/mongod.service.
[root@controller ~]
安装消息列队(controller) rabbitmq消息队列服务在openstack中起到非常关键的作用,它好比是一个交通枢纽,各个组件之间的通信由它来完成。
启动rabbitmq-server服务
1
2
3
[root@controller ~]
Created symlink from /etc/systemd/system/multi-user.target.wants/rabbitmq-server.service to /usr/lib/systemd/system/rabbitmq-server.service.
[root@controller ~]
添加openstack用户
1
2
[root@controller ~]
Creating user "openstack" ...
密码 o3NXovnz5 用户名为openstack
为openstack用户授权
1
2
[root@controller ~]
Setting permissions for user "openstack" in vhost "/" ...
允许openstack用户可以配置,可以写,可以读
6.增加identity - keystone介绍(controller) identity即keystone,它是openstack的验证中心,所有的服务都由它来认证。参考 openstack keystone整体架构与功能
在keyston中有以下角色:tenants(租户或项目)、用户、角色、服务目录和端点
如果把宾馆比作为Tenant,住宿的人就是User ,宾馆可以提供多种诸如住宿、娱乐、饮食等多种服务(Service),具体来说,住宿是一种具体的服务(Endpoint)。就住宿而言,有普通间和总统套房,如果你的VIP等级(Role)高,你可以享受到豪华的总统套房。入住前,我们需要拿身份证开房(Credential),认证身份证不是冒牌货后 (Authenticaiton),会给你一个房卡(Token),然后你拿着房卡,就可以进入房间和享受各种服务。
以创建一个虚拟机(server)为例,keystone在openstack的访问流程大致如下:
1). 用户Alice通过自己的户名和密码向keystone申请token,keystone认证用户名和密码后,返回token1
2). Alice通过token1发送keystone查询他所拥有的租户,keystone验证token1成功后,返回Alice的所有Tenant
3). Alice选择一个租户,通过用户名和密码申请token,keystone认证用户名、密码、tenant后,返回token2。(其实1、2步仅仅是为了查询tenant,如果已经知道tenant,可以忽略1、2步)
4). Alice通过token2发送创建server的请求,keystone验证token2(包括该token是否有效,是否有权限创建虚拟机等)成功后,然后再把请求下发到nova,最终创建虚拟机
7.增加identity - 前期准备(controller) 登陆mysql,创建数据库
1
2
3
4
5
6
7
8
MariaDB [(none)]> create database keystone;
Query OK, 1 row affected (0.00 sec)
MariaDB [(none)]> GRANT ALL PRIVILEGES ON keystone.* TO 'keystone' @'localhost' IDENTIFIED BY 'f6zx0gURv' ;
Query OK, 0 rows affected (0.00 sec)
MariaDB [(none)]> GRANT ALL PRIVILEGES ON keystone.* TO 'keystone' @'%' IDENTIFIED BY 'f6zx0gURv' ;
Query OK, 0 rows affected (0.00 sec)
说明,创建一个keystone库,并且授权给keystone用户所有权限,密码为f6zx0gURv
安装相关的包
启动memcached服务
1
2
3
[root@controller ~]
Created symlink from /etc/systemd/system/multi-user.target.wants/memcached.service to /usr/lib/systemd/system/memcached.service.
[root@controller ~]
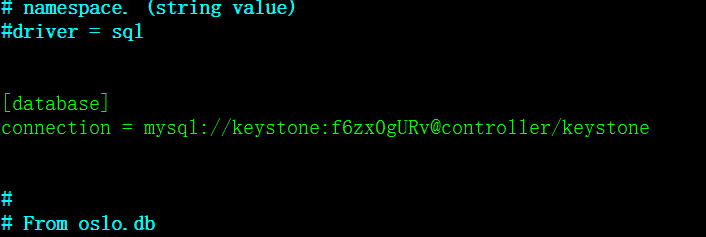
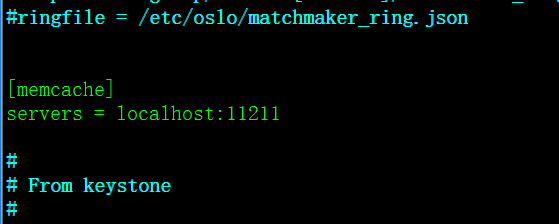
编辑keystone配置文件 /etc/keystone/keystone.conf 修改或增加配置如下
1
2
3
4
5
6
7
8
9
10
11
12
13
14
15
16
[root@controller ~]
```
```bash
[DEFAULT]
admin_token = 3qiVpzU2x
verbose = true
[database]
connection = mysql://keystone:f6zx0gURv@controller/keystone
[memcache]
servers = localhost:11211
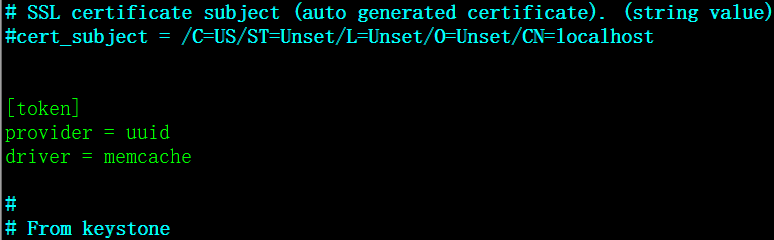
[token]
provider = uuid
driver = memcache
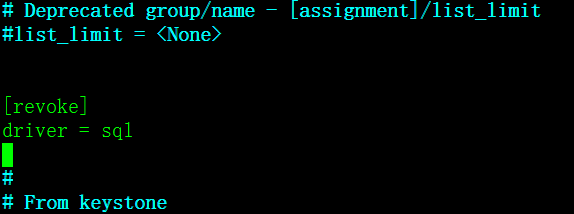
[revoke]
driver = sql
导入keystone相关的数据
1
2
[root@controller ~]
No handlers could be found for logger "oslo_config.cfg"
这里会有个提示 No handlers could be found for logger “oslo_config.cfg” 忽略它,不影响
检查有没有正常导入数据:
1
2
3
4
5
6
7
[root@controller ~]
MariaDB [(none)]> use keystone;
Reading table information for completion of table and column names
You can turn off this feature to get a quicker startup with -A
Database changed
MariaDB [keystone]> show tables;
或者
看是否有列出表来,如果是空,说明没有成功导入数据
配置apache
先编辑配置文件 /etc/httpd/conf/httpd.conf
增加或更改
编辑配置文件 vim /etc/httpd/conf.d/wsgi-keystone.conf 内容如下
1
2
3
4
5
6
7
8
9
10
11
12
13
14
15
16
17
18
19
20
21
22
23
24
25
26
27
28
29
30
31
32
33
34
35
36
37
38
39
40
41
42
43
44
Listen 5000
Listen 35357
<VirtualHost *:5000>
WSGIDaemonProcess keystone-public processes=5 threads=1 user=keystone group=keystone display-name=%{GROUP}
WSGIProcessGroup keystone-public
WSGIScriptAlias / /usr/bin/keystone-wsgi-public
WSGIApplicationGroup %{GLOBAL}
WSGIPassAuthorization On
<IfVersion >= 2.4>
ErrorLogFormat "%{cu}t %M"
</IfVersion>
ErrorLog /var/log /httpd/keystone-error.log
CustomLog /var/log /httpd/keystone-access.log combined
<Directory /usr/bin>
<IfVersion >= 2.4>
Require all granted
</IfVersion>
<IfVersion < 2.4>
Order allow,deny
Allow from all
</IfVersion>
</Directory>
</VirtualHost>
<VirtualHost *:35357>
WSGIDaemonProcess keystone-admin processes=5 threads=1 user=keystone group=keystone display-name=%{GROUP}
WSGIProcessGroup keystone-admin
WSGIScriptAlias / /usr/bin/keystone-wsgi-admin
WSGIApplicationGroup %{GLOBAL}
WSGIPassAuthorization On
<IfVersion >= 2.4>
ErrorLogFormat "%{cu}t %M"
</IfVersion>
ErrorLog /var/log /httpd/keystone-error.log
CustomLog /var/log /httpd/keystone-access.log combined
<Directory /usr/bin>
<IfVersion >= 2.4>
Require all granted
</IfVersion>
<IfVersion < 2.4>
Order allow,deny
Allow from all
</IfVersion>
</Directory>
</VirtualHost
启动apache
1
2
3
[root@controller ~]
Created symlink from /etc/systemd/system/multi-user.target.wants/httpd.service to /usr/lib/systemd/system/httpd.service.
[root@controller ~]
8.增加identity - 创建服务实例(controller) 首先设置环境变量:
1
2
3
[root@controller ~]
[root@controller ~]
[root@controller ~]
1
2
[root@controller ~]
3qiVpzU2x
成功之后可以用命令查看密码
然后创建服务实例
1
2
3
4
5
6
7
8
9
10
[root@controller ~]
+-------------+----------------------------------+
| Field | Value |
+-------------+----------------------------------+
| description | OpenStack Identity |
| enabled | True |
| id | 798a1feefccb4e8d817fa96aa44bb26e |
| name | keystone |
| type | identity |
+-------------+----------------------------------+
创建端点
1
2
3
4
5
6
7
8
9
10
11
12
13
14
15
16
17
18
19
20
21
22
23
24
25
26
27
28
29
30
31
32
33
34
35
36
37
38
39
40
41
42
[root@controller ~]
+--------------+----------------------------------+
| Field | Value |
+--------------+----------------------------------+
| enabled | True |
| id | 3d6e544e7e3e4844aef5c699e4841771 |
| interface | public |
| region | RegionOne |
| region_id | RegionOne |
| service_id | 798a1feefccb4e8d817fa96aa44bb26e |
| service_name | keystone |
| service_type | identity |
| url | http://controller:5000/v2.0 |
+--------------+----------------------------------+
[root@controller ~]
+--------------+----------------------------------+
| Field | Value |
+--------------+----------------------------------+
| enabled | True |
| id | 38d5f56bba0f40b6a312dfd3a55b5275 |
| interface | internal |
| region | RegionOne |
| region_id | RegionOne |
| service_id | 798a1feefccb4e8d817fa96aa44bb26e |
| service_name | keystone |
| service_type | identity |
| url | http://controller:5000/v2.0 |
+--------------+----------------------------------+
[root@controller ~]
+--------------+----------------------------------+
| Field | Value |
+--------------+----------------------------------+
| enabled | True |
| id | fc20fb651f844827be6b519cdb961c09 |
| interface | admin |
| region | RegionOne |
| region_id | RegionOne |
| service_id | 798a1feefccb4e8d817fa96aa44bb26e |
| service_name | keystone |
| service_type | identity |
| url | http://controller:35357/v2.0 |
+--------------+----------------------------------+
创建租户(tenants)、用户以及角色
创建admin 租户
1
2
3
4
5
6
7
8
9
10
11
12
[root@controller ~]
+-------------+----------------------------------+
| Field | Value |
+-------------+----------------------------------+
| description | Admin Project |
| domain_id | default |
| enabled | True |
| id | 6a1d53e8e3b04b8bb83d19e92092ea38 |
| is_domain | False |
| name | admin |
| parent_id | None |
+-------------+----------------------------------+
创建admin用户 (密码为3qiVpzU2x)
1
2
3
4
5
6
7
8
9
10
11
[root@controller ~]
User Password:
Repeat User Password:
+-----------+----------------------------------+
| Field | Value |
+-----------+----------------------------------+
| domain_id | default |
| enabled | True |
| id | 5d580681150c4814a33b53367f3ca453 |
| name | admin |
+-----------+----------------------------------+
创建admin角色
1
2
3
4
5
6
7
[root@controller ~]
+-------+----------------------------------+
| Field | Value |
+-------+----------------------------------+
| id | 45d56dc92dc84001932949aa9391ac05 |
| name | admin |
+-------+----------------------------------+
添加admin角色到admin租户和用户
下面我们再来创建一个service 租户
1
2
3
4
5
6
7
8
9
10
11
12
[root@controller ~]
+-------------+----------------------------------+
| Field | Value |
+-------------+----------------------------------+
| description | Service Project |
| domain_id | default |
| enabled | True |
| id | ad59d222484e4c9381d46322a8f34ebe |
| is_domain | False |
| name | service |
| parent_id | None |
+-------------+----------------------------------+
创建demo租户
1
2
3
4
5
6
7
8
9
10
11
12
[root@controller ~]
+-------------+----------------------------------+
| Field | Value |
+-------------+----------------------------------+
| description | Demo Project |
| domain_id | default |
| enabled | True |
| id | 003e738c4cc848d2b3d19c63a69169e1 |
| is_domain | False |
| name | demo |
| parent_id | None |
+-------------+----------------------------------+
创建demo用户 (密码9TtbgaA1q)
1
2
3
4
5
6
7
8
9
10
11
[root@controller ~]
User Password:
Repeat User Password:
+-----------+----------------------------------+
| Field | Value |
+-----------+----------------------------------+
| domain_id | default |
| enabled | True |
| id | a4e31690c437446ab1fcfc68beef9b1c |
| name | demo |
+-----------+----------------------------------+
创建角色user
1
2
3
4
5
6
7
[root@controller ~]
+-------+----------------------------------+
| Field | Value |
+-------+----------------------------------+
| id | b55d5c19857740239c9b2cca2e064359 |
| name | user |
+-------+----------------------------------+
添加user角色到demo租户和demo用户
验证admin用户和demo用户是否能正常登陆
首先做一个安全设置:
搜索admin_token_auth, 从[pipeline:public_api], [pipeline:admin_api]和[pipeline:api_v3]中,把admin_token_auth去掉,例如把
改为
改为
改为
取消环境变量OS_TOKEN和OS_URL
然后再登陆admin和demo用户
1
2
3
4
5
6
7
8
9
10
[root@controller ~]
Password:
+------------+----------------------------------+
| Field | Value |
+------------+----------------------------------+
| expires | 2017-01-16T03:56:24.514931Z |
| id | 3a9529d4a2b1446291d54ea764f67832 |
| project_id | 6a1d53e8e3b04b8bb83d19e92092ea38 |
| user_id | 5d580681150c4814a33b53367f3ca453 |
+------------+----------------------------------+
1
2
3
4
5
6
7
8
9
10
[root@controller ~]
Password:
+------------+----------------------------------+
| Field | Value |
+------------+----------------------------------+
| expires | 2017-01-16T03:58:00.066876Z |
| id | 8712ff834d954a1c9ed30c4d45902d99 |
| project_id | 003e738c4cc848d2b3d19c63a69169e1 |
| user_id | a4e31690c437446ab1fcfc68beef9b1c |
+------------+----------------------------------+
创建openstack客户端脚本
内容
1
2
3
4
5
6
7
8
export OS_PROJECT_DOMAIN_ID=default
export OS_USER_DOMAIN_ID=default
export OS_PROJECT_NAME=admin
export OS_TENANT_NAME=admin
export OS_USERNAME=admin
export OS_PASSWORD=3qiVpzU2x
export OS_AUTH_URL=http://controller:35357/v3
export OS_IDENTITY_API_VERSION=3
执行脚本
申请认证令牌
1
2
3
4
5
6
7
8
9
[root@controller ~]
+------------+----------------------------------+
| Field | Value |
+------------+----------------------------------+
| expires | 2017-01-16T04:16:18.542286Z |
| id | 3e4ceb2f0c404e309b9ced709dfc61cd |
| project_id | 6a1d53e8e3b04b8bb83d19e92092ea38 |
| user_id | 5d580681150c4814a33b53367f3ca453 |
+------------+----------------------------------+
创建openstack客户端脚本
内容
1
2
3
4
5
6
7
8
export OS_PROJECT_DOMAIN_ID=default
export OS_USER_DOMAIN_ID=default
export OS_PROJECT_NAME=demo
export OS_TENANT_NAME=demo
export OS_USERNAME=demo
export OS_PASSWORD=9TtbgaA1q
export OS_AUTH_URL=http://controller:5000/v3
export OS_IDENTITY_API_VERSION=3
执行脚本
申请认证令牌
1
2
3
4
5
6
7
8
9
10
[root@controller ~]
[root@controller ~]
+------------+----------------------------------+
| Field | Value |
+------------+----------------------------------+
| expires | 2017-01-16T04:16:33.929333Z |
| id | b6010fc692754602a202354ca9efd475 |
| project_id | 003e738c4cc848d2b3d19c63a69169e1 |
| user_id | a4e31690c437446ab1fcfc68beef9b1c |
+------------+----------------------------------+
9.增加 glance 组件 增加image - 前期准备(controller) image又叫做glance,是用来管理镜像的一个组件,我们用镜像来安装操作系统。glance支持让用户自己管理自定义镜像。
创建glance库和用户
1
2
3
4
5
6
7
8
MariaDB [(none)]> CREATE database glance;
Query OK, 1 row affected (0.00 sec)
MariaDB [(none)]> GRANT ALL PRIVILEGES ON glance.* TO 'glance' @'localhost' IDENTIFIED BY 'Zznky4tP0' ;
Query OK, 0 rows affected (0.01 sec)
MariaDB [(none)]> GRANT ALL PRIVILEGES ON glance.* TO 'glance' @'%' IDENTIFIED BY 'Zznky4tP0' ;
Query OK, 0 rows affected (0.00 sec)
执行 admin-openrc.sh 脚本
创建glance用户(密码为hf8LX9bow)
1
2
3
4
5
6
7
8
9
10
11
[root@controller ~]
User Password:
Repeat User Password:
+-----------+----------------------------------+
| Field | Value |
+-----------+----------------------------------+
| domain_id | default |
| enabled | True |
| id | ccaa39f341a84ba28efbdc12858ab147 |
| name | glance |
+-----------+----------------------------------+
把admin角色添加到glance用户和service租户
创建glance服务实体
1
2
3
4
5
6
7
8
9
10
[root@controller ~]
+-------------+----------------------------------+
| Field | Value |
+-------------+----------------------------------+
| description | OpenStack Image service |
| enabled | True |
| id | 08b9dc2e841740b2bdeba8413aca368c |
| name | glance |
| type | image |
+-------------+----------------------------------+
创建image服务api 端点
1
2
3
4
5
6
7
8
9
10
11
12
13
14
[root@controller ~]
+--------------+----------------------------------+
| Field | Value |
+--------------+----------------------------------+
| enabled | True |
| id | 82fdb35f5d974143852d294246a73d7f |
| interface | public |
| region | RegionOne |
| region_id | RegionOne |
| service_id | 08b9dc2e841740b2bdeba8413aca368c |
| service_name | glance |
| service_type | image |
| url | http://controller:9292 |
+--------------+----------------------------------+
1
2
3
4
5
6
7
8
9
10
11
12
13
14
[root@controller ~]
+--------------+----------------------------------+
| Field | Value |
+--------------+----------------------------------+
| enabled | True |
| id | 29fa12237cfe44f9b2304565edebd650 |
| interface | internal |
| region | RegionOne |
| region_id | RegionOne |
| service_id | 08b9dc2e841740b2bdeba8413aca368c |
| service_name | glance |
| service_type | image |
| url | http://controller:9292 |
+--------------+----------------------------------+
1
2
3
4
5
6
7
8
9
10
11
12
13
14
[root@controller ~]
+--------------+----------------------------------+
| Field | Value |
+--------------+----------------------------------+
| enabled | True |
| id | 4ca144efb4d74f628f7ba472e144a908 |
| interface | admin |
| region | RegionOne |
| region_id | RegionOne |
| service_id | 08b9dc2e841740b2bdeba8413aca368c |
| service_name | glance |
| service_type | image |
| url | http://controller:9292 |
+--------------+----------------------------------+
安装包
编辑配置文件
更改或增加
1
2
3
4
5
6
7
8
9
10
11
12
13
14
15
16
17
18
19
20
21
22
23
[database]
connection = mysql://glance:Zznky4tP0@controller/glance
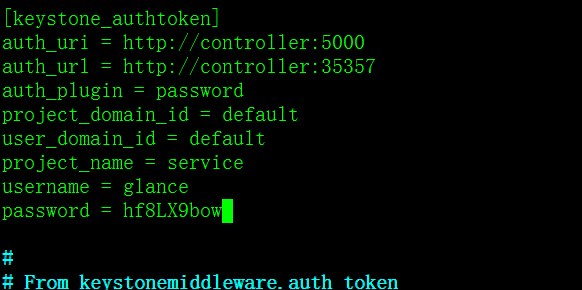
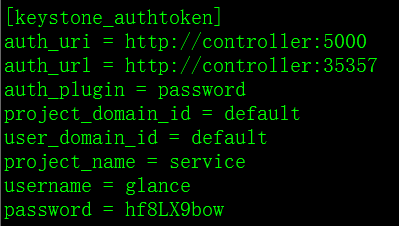
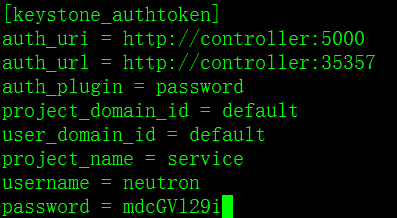
[keystone_authtoken]
auth_uri = http://controller:5000
auth_url = http://controller:35357
auth_plugin = password
project_domain_id = default
user_domain_id = default
project_name = service
username = glance
password = hf8LX9bow
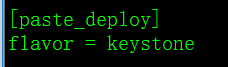
[paste_deploy]
flavor = keystone
[glance_store]
default_store = file
filesystem_store_datadir = /var/lib/glance/images/
[DEFAULT]
notificaction_driver = noop
verbose=True
编辑配置文件
更改或增加
1
2
3
4
5
6
7
8
9
10
11
12
13
14
15
16
17
18
19
[DEFAULT]
notificaction_driver = noop
verbose=True
[database]
connection = mysql://glance:Zznky4tP0@controller/glance
[keystone_authtoken]
auth_uri = http://controller:5000
auth_url = http://controller:35357
auth_plugin = password
project_domain_id = default
user_domain_id = default
project_name = service
username = glance
password = hf8LX9bow
[paste_deploy]
flavor = keystone
同步glance数据库数据
1
2
3
4
[root@controller ~]
No handlers could be found for logger "oslo_config.cfg"
/usr/lib64/python2.7/site-packages/sqlalchemy/engine/default.py:450: Warning: Duplicate index 'ix_image_properties_image_id_name' defined on the table 'glance.image_properties' . This is deprecated and will be disallowed in a future release.
cursor.execute(statement, parameters)
启动服务
1
2
3
[root@controller ~]
Created symlink from /etc/systemd/system/multi-user.target.wants/openstack-glance-api.service to /usr/lib/systemd/system/openstack-glance-api.service.
Created symlink from /etc/systemd/system/multi-user.target.wants/openstack-glance-registry.service to /usr/lib/systemd/system/openstack-glance-registry.service.
增加image - 验证操作(controller) (1) 添加环境变量
1
2
3
4
5
6
7
8
9
10
11
12
13
[root@controller ~]
export OS_IMAGE_API_VERSION=2
[root@controller ~]
#!/bin/bash
export OS_PROJECT_DOMAIN_ID=default
export OS_USER_DOMAIN_ID=default
export OS_PROJECT_NAME=admin
export OS_TENANT_NAME=admin
export OS_USERNAME=admin
export OS_PASSWORD=3qiVpzU2x
export OS_AUTH_URL=http://controller:35357/v3
export OS_IDENTITY_API_VERSION=3
export OS_IMAGE_API_VERSION=2
(2) 执行admin-openrc.sh
(3)下载镜像
(4) 把刚刚下载的镜像上传到镜像服务中心
1
2
3
4
5
6
7
8
9
10
11
12
13
14
15
16
17
18
19
20
21
22
23
24
25
[root@controller ~]
> --file cirros-0.3.4-x86_64-disk.img \
> --disk-format qcow2 --container-format bare \
> --visibility public --progress
[=============================>] 100%
+------------------+--------------------------------------+
| Property | Value |
+------------------+--------------------------------------+
| checksum | 617966a8b6bec61f9d7bcc442deae50d |
| container_format | bare |
| created_at | 2017-01-16T04:46:14Z |
| disk_format | qcow2 |
| id | 8def7abc-11f1-47d7-8449-bca9f26b1c6e |
| min_disk | 0 |
| min_ram | 0 |
| name | cirros |
| owner | 6a1d53e8e3b04b8bb83d19e92092ea38 |
| protected | False |
| size | 2102282 |
| status | active |
| tags | [] |
| updated_at | 2017-01-16T04:46:15Z |
| virtual_size | None |
| visibility | public |
+------------------+--------------------------------------+
然后我们可以在 /var/lib/glance/images/目录下看到一个文件,这个就是刚刚上传的镜像,你会发现这个文件的名字和id是一致的。
1
2
[root@controller ~]
/var/lib/glance/images/8def7abc-11f1-47d7-8449-bca9f26b1c6e
使用命令 glance image-list 可以查看镜像列表
1
2
3
4
5
6
[root@controller ~]
+--------------------------------------+--------+
| ID | Name |
+--------------------------------------+--------+
| 8def7abc-11f1-47d7-8449-bca9f26b1c6e | cirros |
+--------------------------------------+--------+
10.增加 nova 组件 增加compute - 前期准备(controller) compute又叫nova,是OpenStack中的计算组织控制器。OpenStack中实例(instances)生命周期的所有活动都由Nova处理。这样使得Nova成为一个负责管理计算资源、网络、认证、所需可扩展性的平台。但是,Nova自身并没有提供任何虚拟化能力,相反它使用libvirt API来与被支持的Hypervisors(kvm、xen、vmware等)交互。
创建nova库,并创建nova用户
1
2
3
4
5
6
7
8
MariaDB [(none)]> CREATE DATABASE nova;
Query OK, 1 row affected (0.00 sec)
MariaDB [(none)]> GRANT ALL PRIVILEGES ON nova.* TO 'nova' @'localhost' IDENTIFIED BY 'RYgv0rg7p' ;
Query OK, 0 rows affected (0.05 sec)
MariaDB [(none)]> MariaDB [(none)]> GRANT ALL PRIVILEGES ON nova.* TO 'nova' @'%' IDENTIFIED BY 'RYgv0rg7p' ;
Query OK, 0 rows affected (0.00 sec)
初始化环境变量
创建nova用户 密码为 hsSNsqc43
1
2
3
4
5
6
7
8
9
10
11
[root@controller ~]
User Password:
Repeat User Password:
+-----------+----------------------------------+
| Field | Value |
+-----------+----------------------------------+
| domain_id | default |
| enabled | True |
| id | 43d1f84437414405a654b375a83c03ff |
| name | nova |
+-----------+----------------------------------+
添加admin角色到nova用户
创建nova服务实例
1
2
3
4
5
6
7
8
9
10
[root@controller ~]
+-------------+----------------------------------+
| Field | Value |
+-------------+----------------------------------+
| description | OpenStack Compute |
| enabled | True |
| id | 23c52463f4ee43798f0adf5b1ba6da93 |
| name | nova |
| type | compute |
+-------------+----------------------------------+
创建api端点
1
2
3
4
5
6
7
8
9
10
11
12
13
14
[root@controller ~]
+--------------+-----------------------------------------+
| Field | Value |
+--------------+-----------------------------------------+
| enabled | True |
| id | d15accf37377409e82388e625440a066 |
| interface | public |
| region | RegionOne |
| region_id | RegionOne |
| service_id | 23c52463f4ee43798f0adf5b1ba6da93 |
| service_name | nova |
| service_type | compute |
| url | http://controller:8774/v2/%(tenant_id)s |
+--------------+-----------------------------------------+
1
2
3
4
5
6
7
8
9
10
11
12
13
14
[root@controller ~]
+--------------+-----------------------------------------+
| Field | Value |
+--------------+-----------------------------------------+
| enabled | True |
| id | 7cd1a5f1ecd84a96a1fea1bd50c29721 |
| interface | internal |
| region | RegionOne |
| region_id | RegionOne |
| service_id | 23c52463f4ee43798f0adf5b1ba6da93 |
| service_name | nova |
| service_type | compute |
| url | http://controller:8774/v2/%(tenant_id)s |
+--------------+-----------------------------------------+
1
2
3
4
5
6
7
8
9
10
11
12
13
14
[root@controller ~]
+--------------+-----------------------------------------+
| Field | Value |
+--------------+-----------------------------------------+
| enabled | True |
| id | bf598c8a131143b4aecedd21a9ffd345 |
| interface | admin |
| region | RegionOne |
| region_id | RegionOne |
| service_id | 23c52463f4ee43798f0adf5b1ba6da93 |
| service_name | nova |
| service_type | compute |
| url | http://controller:8774/v2/%(tenant_id)s |
+--------------+-----------------------------------------+
1
2
[root@controller ~]
> openstack-nova-novncproxy openstack-nova-scheduler python-novaclient
编辑配置文件
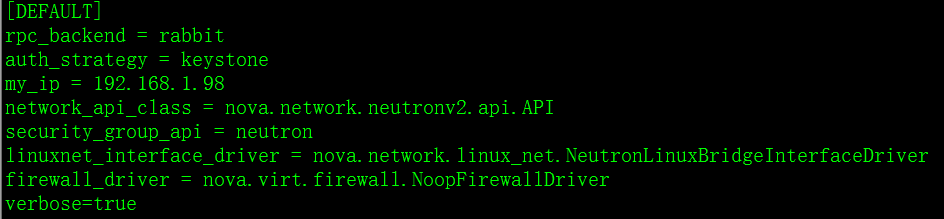
更改或增加配置
1
2
3
4
5
6
7
8
9
10
11
12
13
14
15
16
17
18
19
20
21
22
23
24
25
26
27
28
29
30
31
32
33
34
35
36
37
38
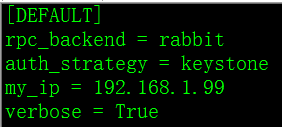
[DEFAULT]
rpc_backend=rabbit
my_ip=192.168.16.111
auth_strategy=keystone
network_api_class = nova.network.neutronv2.api.API
security_group_api = neutron
linuxnet_interface_driver = nova.network.linux_net.NeutronLinuxBridgeInterfaceDriver
firewall_driver = nova.virt.firewall.NoopFirewallDriver
enabled_apis=osapi_compute,metadata
verbose=true
[database]
connection = mysql://nova:RYgv0rg7p@controller/nova
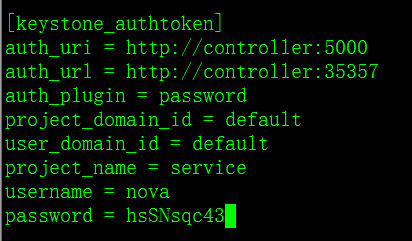
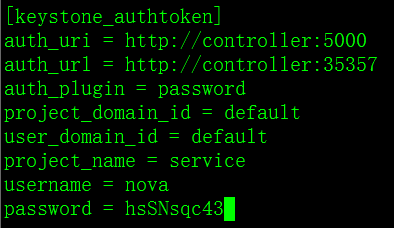
[keystone_authtoken]
auth_uri = http://controller:5000
auth_url = http://controller:35357
auth_plugin = password
project_domain_id = default
user_domain_id = default
project_name = service
username = nova
password = hsSNsqc43
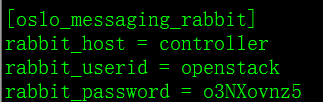
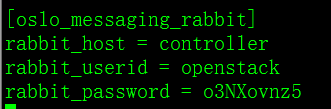
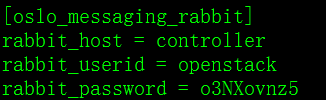
[oslo_messaging_rabbit]
rabbit_host = controller
rabbit_userid = openstack
rabbit_password = o3NXovnz5
[vnc]
vncserver_listen = $my_ip
vncserver_proxyclient_address = $my_ip
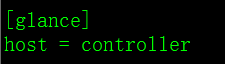
[glance]
host = controller
[oslo_concurrency]
lock_path = /var/lib/nova/tmp
同步数据创建nova库
1
2
[root@controller ~]
No handlers could be found for logger "oslo_config.cfg"
启动服务
1
2
3
4
5
6
7
8
9
10
[root@controller ~]
> openstack-nova-cert.service openstack-nova-consoleauth.service \
> openstack-nova-scheduler.service openstack-nova-conductor.service \
> openstack-nova-novncproxy.service
Created symlink from /etc/systemd/system/multi-user.target.wants/openstack-nova-api.service to /usr/lib/systemd/system/openstack-nova-api.service.
Created symlink from /etc/systemd/system/multi-user.target.wants/openstack-nova-cert.service to /usr/lib/systemd/system/openstack-nova-cert.service.
Created symlink from /etc/systemd/system/multi-user.target.wants/openstack-nova-consoleauth.service to /usr/lib/systemd/system/openstack-nova-consoleauth.service.
Created symlink from /etc/systemd/system/multi-user.target.wants/openstack-nova-scheduler.service to /usr/lib/systemd/system/openstack-nova-scheduler.service.
Created symlink from /etc/systemd/system/multi-user.target.wants/openstack-nova-conductor.service to /usr/lib/systemd/system/openstack-nova-conductor.service.
Created symlink from /etc/systemd/system/multi-user.target.wants/openstack-nova-novncproxy.service to /usr/lib/systemd/system/openstack-nova-novncproxy.service.
1
2
3
4
[root@controller ~]
> openstack-nova-cert.service openstack-nova-consoleauth.service \
> openstack-nova-scheduler.service openstack-nova-conductor.service \
> openstack-nova-novncproxy.service
11.增加 nova 组件 增加compute - 安装包并配置(compute) 安装nova-compute包
编辑配置文件
更改或增加如下配置
1
2
3
4
5
6
7
8
9
10
11
12
13
14
15
16
17
18
19
20
21
22
23
24
25
26
27
28
29
30
31
32
33
34
35
36
[DEFAULT]
rpc_backend = rabbit
auth_strategy = keystone
my_ip = 192.168.16.112
network_api_class = nova.network.neutronv2.api.API
security_group_api = neutron
linuxnet_interface_driver = nova.network.linux_net.NeutronLinuxBridgeInterfaceDriver
firewall_driver = nova.virt.firewall.NoopFirewallDriver
verbose=true
[oslo_messaging_rabbit]
rabbit_host = controller
rabbit_userid = openstack
rabbit_password = o3NXovnz5
[keystone_authtoken]
auth_uri = http://controller:5000
auth_url = http://controller:35357
auth_plugin = password
project_domain_id = default
user_domain_id = default
project_name = service
username = nova
password = hsSNsqc43
[vnc]
enabled = True
vncserver_listen = 0.0.0.0
vncserver_proxyclient_address = $my_ip
novncproxy_base_url = http://controller:6080/vnc_auto.html
[glance]
host = controller
[oslo_concurrency]
lock_path = /var/lib/nova/tmp
使用如下命令检查你的机器cpu是否支持虚拟化
如果得到的数字大于0,说明是支持的,否则说明不支持,若为0,需要编辑配置文件,不等于0就不用编辑配置
编辑
1
2
[libvirt]
virt_type = qemu
启动服务
1
2
[root@compute ~]
Created symlink from /etc/systemd/system/multi-user.target.wants/openstack-nova-compute.service to /usr/lib/systemd/system/openstack-nova-compute.service.
增加compute - 验证操作(controller) 执行脚本
列出服务组件
1
2
3
4
5
6
7
8
9
10
[root@controller ~]
+----+------------------+------------+----------+---------+-------+----------------------------+-----------------+
| Id | Binary | Host | Zone | Status | State | Updated_at | Disabled Reason |
+----+------------------+------------+----------+---------+-------+----------------------------+-----------------+
| 1 | nova-consoleauth | controller | internal | enabled | up | 2017-01-17T04:53:08.000000 | - |
| 2 | nova-cert | controller | internal | enabled | up | 2017-01-17T04:53:10.000000 | - |
| 3 | nova-conductor | controller | internal | enabled | up | 2017-01-17T04:53:10.000000 | - |
| 4 | nova-scheduler | controller | internal | enabled | up | 2017-01-17T04:53:10.000000 | - |
| 5 | nova-compute | compute | nova | enabled | up | 2017-01-17T04:53:11.000000 | - |
+----+------------------+------------+----------+---------+-------+----------------------------+-----------------+
共有5个:nova-consoleauth nova-conductor nova-scheduler nova-cert nova-compute
列出api端点,一共有9组: nova三组,glance三组,keystone三组
如果有提示
1
WARNING: nova has no endpoint in ! Available endpoints for this service:
可以忽略掉,也可以编辑
增加一行
1
export OS_REGION_NAME=RegionOne
列出镜像
12.增加 neutron 组件 增加Networking - 前期准备(controller) Networking又叫做Neutron,是Openstack必不可少的组件,它其实是网络虚拟化的实现工具,可以让我们模拟出路由器、交换机、网卡等网络设备。
关于Neutron的电子书 深入理解 Neutron – OpenStack 网络实现
Neutron支持两种网络模式,第一种是非常简单的网络架构,它仅支持是让实例连接外网,不支持自定义网络、路由器以及浮动ip。只有管理员或者授权的用户有权限去管理网络。第二种网络功能比较强大,支持自定义网络管理,支持自建路由器并且也支持浮动ip。即使没有授权的用户也可以管理网络,支持用户自己配置和管理。
创建库、授权账号
1
2
3
4
5
6
7
8
MariaDB [(none)]> CREATE DATABASE neutron;
Query OK, 1 row affected (0.00 sec)
MariaDB [(none)]> GRANT ALL PRIVILEGES ON neutron.* TO 'neutron' @'localhost' IDENTIFIED BY 'quidyOC50' ;
Query OK, 0 rows affected (0.03 sec)
MariaDB [(none)]> GRANT ALL PRIVILEGES ON neutron.* TO 'neutron' @'%' IDENTIFIED BY 'quidyOC50' ;
Query OK, 0 rows affected (0.00 sec)
执行脚本
创建neutron用户(密码为mdcGVl29i)
1
2
3
4
5
6
7
8
9
10
11
[root@controller ~]
User Password:
Repeat User Password:
+-----------+----------------------------------+
| Field | Value |
+-----------+----------------------------------+
| domain_id | default |
| enabled | True |
| id | 36a6f48840294e71970f5d13af7325f6 |
| name | neutron |
+-----------+----------------------------------+
把admin角色添加到neutron用户里
创建neutron实例
1
2
3
4
5
6
7
8
9
10
[root@controller ~]
+-------------+----------------------------------+
| Field | Value |
+-------------+----------------------------------+
| description | OpenStack Networking |
| enabled | True |
| id | 27e0015e24654eb7bc06569ca10046b5 |
| name | neutron |
| type | network |
+-------------+----------------------------------+
创建networking服务api终端
1
2
3
4
5
6
7
8
9
10
11
12
13
14
[root@controller ~]
+--------------+----------------------------------+
| Field | Value |
+--------------+----------------------------------+
| enabled | True |
| id | c46e6aaffb6d4de09a995168f6c05b5b |
| interface | public |
| region | RegionOne |
| region_id | RegionOne |
| service_id | 27e0015e24654eb7bc06569ca10046b5 |
| service_name | neutron |
| service_type | network |
| url | http://controller:9696 |
+--------------+----------------------------------+
1
2
3
4
5
6
7
8
9
10
11
12
13
14
[root@controller ~]
+--------------+----------------------------------+
| Field | Value |
+--------------+----------------------------------+
| enabled | True |
| id | 41fa137019f940a98fbe027caadf5b96 |
| interface | internal |
| region | RegionOne |
| region_id | RegionOne |
| service_id | 27e0015e24654eb7bc06569ca10046b5 |
| service_name | neutron |
| service_type | network |
| url | http://controller:9696 |
+--------------+----------------------------------+
1
2
3
4
5
6
7
8
9
10
11
12
13
14
[root@controller ~]
+--------------+----------------------------------+
| Field | Value |
+--------------+----------------------------------+
| enabled | True |
| id | cab01468677d44258344b56b797e862a |
| interface | admin |
| region | RegionOne |
| region_id | RegionOne |
| service_id | 27e0015e24654eb7bc06569ca10046b5 |
| service_name | neutron |
| service_type | network |
| url | http://controller:9696 |
+--------------+----------------------------------+
增加Networking - 配置(controller) 安装组件
1
2
[root@controller ~]
> openstack-neutron-linuxbridge python-neutronclient ebtables ipset
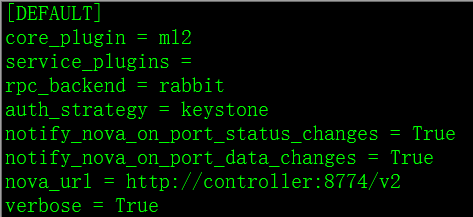
配置服务端组件
更改或增加
1
2
3
4
5
6
7
8
9
10
11
12
13
14
15
16
17
18
19
20
21
22
23
24
25
26
27
28
29
30
31
32
33
34
35
36
37
38
39
40
[DEFAULT]
core_plugin = ml2
service_plugins =
rpc_backend = rabbit
auth_strategy = keystone
notify_nova_on_port_status_changes = True
notify_nova_on_port_data_changes = True
nova_url = http://controller:8774/v2
verbose = True
[database]
connection = mysql://neutron:quidyOC50@controller/neutron
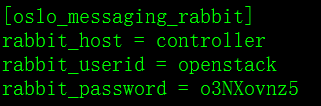
[oslo_messaging_rabbit]
rabbit_host = controller
rabbit_userid = openstack
rabbit_password = o3NXovnz5
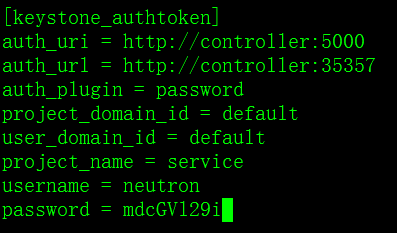
[keystone_authtoken]
auth_uri = http://controller:5000
auth_url = http://controller:35357
auth_plugin = password
project_domain_id = default
user_domain_id = default
project_name = service
username = neutron
password = mdcGVl29i
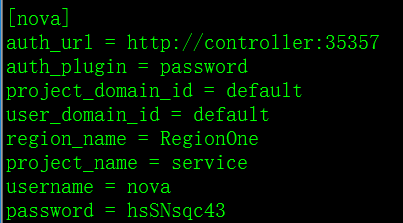
[nova]
auth_url = http://controller:35357
auth_plugin = password
project_domain_id = default
user_domain_id = default
region_name = RegionOne
project_name = service
username = nova
password = hsSNsqc43
[oslo_concurrency]
lock_path = /var/lib/neutron/tmp
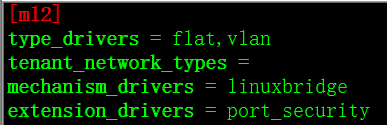
配置ml2 插件
更改或增加
1
2
3
4
5
6
7
8
9
10
11
[ml2]
type_drivers = flat,vlan
tenant_network_types =
mechanism_drivers = linuxbridge
extension_drivers = port_security
[ml2_type_flat]
flat_networks = public
[securitygroup]
enable_ipset = True
编辑linux桥接agent
增加或更改
1
2
3
4
5
6
7
8
9
10
11
12
[linux_bridge]
physical_interface_mappings = public:ens33
[vxlan]
enable_vxlan = False
[agent]
prevent_arp_spoofing = True
[securitygroup]
enable_security_group = True
firewall_driver = neutron.agent.linux.iptables_firewall.IptablesFirewallDriver
配置dhcp agent
增加或更改
1
2
3
4
5
[DEFAULT]
interface_driver = neutron.agent.linux.interface.BridgeInterfaceDriver
dhcp_driver = neutron.agent.linux.dhcp.Dnsmasq
enable_isolated_metadata = True
verbose = True
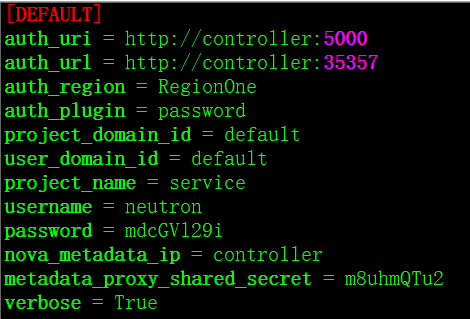
编辑配置文件
更改或增加
1
2
3
4
5
6
7
8
9
10
11
12
13
[DEFAULT]
auth_uri = http://controller:5000
auth_url = http://controller:35357
auth_region = RegionOne
auth_plugin = password
project_domain_id = default
user_domain_id = default
project_name = service
username = neutron
password = mdcGVl29i
nova_metadata_ip = controller
metadata_proxy_shared_secret = m8uhmQTu2
verbose = True
说明:需要删除掉配置文件里原有的 auth_url auth_region admin_tenant_name admin_user admin_password
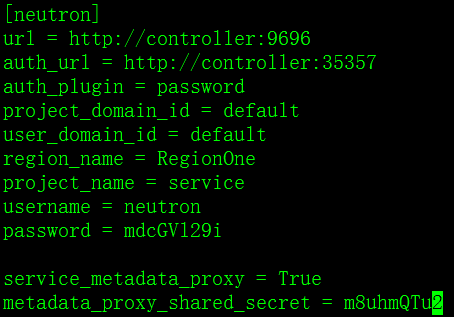
更改或添加
1
2
3
4
5
6
7
8
9
10
11
12
13
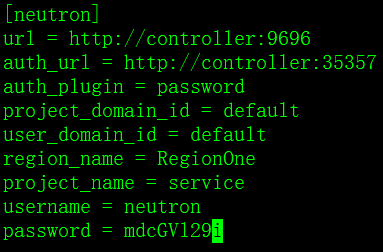
[neutron]
url = http://controller:9696
auth_url = http://controller:35357
auth_plugin = password
project_domain_id = default
user_domain_id = default
region_name = RegionOne
project_name = service
username = neutron
password = mdcGVl29i
service_metadata_proxy = True
metadata_proxy_shared_secret = m8uhmQTu2
增加Networking - 启动服务(controller) 创建ml2插件配置文件创建软连接
生成数据
1
2
[root@controller ~]
> --config-file /etc/neutron/plugins/ml2/ml2_conf.ini upgrade head" neutron
重启compute api服务
启动服务
1
2
3
[root@controller ~]
> neutron-linuxbridge-agent.service neutron-dhcp-agent.service \
> neutron-metadata-agent.service
1
2
3
[root@controller ~]
> neutron-linuxbridge-agent.service neutron-dhcp-agent.service \
> neutron-metadata-agent.service
1
2
[root@controller ~]
Created symlink from /etc/systemd/system/multi-user.target.wants/neutron-l3-agent.service to /usr/lib/systemd/system/neutron-l3-agent.service.
增加Networking - 配置compute节点(compute) 安装组件
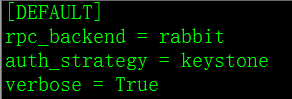
配置普通组件
更改或增加
1
2
3
4
5
6
7
8
9
10
11
12
13
14
15
16
17
18
19
20
21
22
[DEFAULT]
rpc_backend = rabbit
auth_strategy = keystone
verbose = True
[oslo_messaging_rabbit]
rabbit_host = controller
rabbit_userid = openstack
rabbit_password = o3NXovnz5
[keystone_authtoken]
auth_uri = http://controller:5000
auth_url = http://controller:35357
auth_plugin = password
project_domain_id = default
user_domain_id = default
project_name = service
username = neutron
password = mdcGVl29i
[oslo_concurrency]
lock_path = /var/lib/neutron/tmp
配置linux桥接agent
1
2
3
4
5
6
7
8
9
10
11
12
[linux_bridge]
physical_interface_mappings = public:ens33
[vxlan]
enable_vxlan = False
[agent]
prevent_arp_spoofing = True
[securitygroup]
enable_security_group = True
firewall_driver = neutron.agent.linux.iptables_firewall.IptablesFirewallDriver
配置compute使用网络
更改或增加
1
2
3
4
5
6
7
8
9
10
[neutron]
url = http://controller:9696
auth_url = http://controller:35357
auth_plugin = password
project_domain_id = default
user_domain_id = default
region_name = RegionOne
project_name = service
username = neutron
password = mdcGVl29i
启动服务
1
2
[root@compute ~]
Created symlink from /etc/systemd/system/multi-user.target.wants/neutron-linuxbridge-agent.service to /usr/lib/systemd/system/neutron-linuxbridge-agent.service.
增加Networking - 验证配置(controller) 执行环境变量脚本
列出所有的扩展
列出所有agent
agent type如下:
Linux bridge agent
Linux bridge agent
DHCP agent
Metadata agent
必须要有4个,否则说明上面的某个步骤配置有问题。
13.增加 dashboard 组件 增加dashboard - horizon (controller) 安装包
编辑配置文件
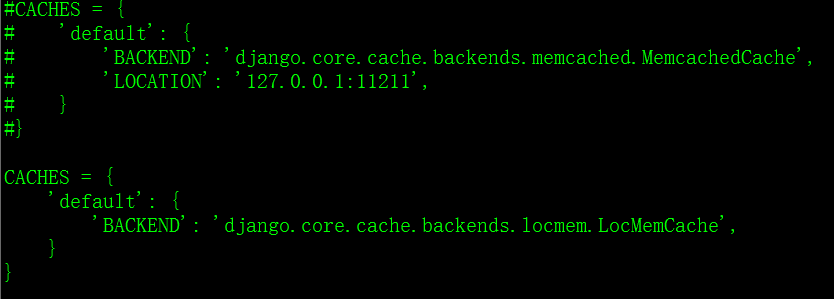
更改或增加
1
2
3
4
5
6
7
8
9
10
11
12
13
14
OPENSTACK_HOST = "controller"
ALLOWED_HOSTS = ['*' , ]
CACHES = {
'default' : {
'BACKEND' : 'django.core.cache.backends.locmem.LocMemCache' ,
'LOCATION' : '127.0.0.1:11211' ,
} }
OPENSTACK_KEYSTONE_DEFAULT_ROLE = "user"
OPENSTACK_KEYSTONE_MULTIDOMAIN_SUPPORT = True
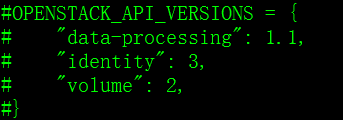
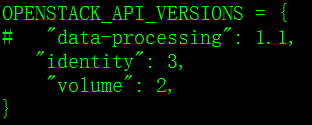
OPENSTACK_API_VERSIONS = {
"identity" : 3,
"volume" : 2,
}
TIME_ZONE = "Asia/Chongqing"
改为
改为
改为
改为
改为
改为
改为
重启服务
此时可以去访问了 http://controller/dashboard 使用账号admin或者demon用户登陆即可,域为default
14.增加 cinder 组件 增加block storage - 前期准备 (controller)
block storage又叫做cinder,用来给openstack提供存储服务,比如我们在阿里云购买一台云主机,同时想购买容量大的磁盘,通常叫做云盘,这个云盘就是block storage。
创建库并授权cinder用户
1
2
3
4
5
6
7
8
MariaDB [(none)]> CREATE DATABASE cinder;
Query OK, 1 row affected (0.00 sec)
MariaDB [(none)]> GRANT ALL PRIVILEGES ON cinder.* TO 'cinder' @'localhost' IDENTIFIED BY 'O3bwbpoZ3' ;
Query OK, 0 rows affected (0.01 sec)
MariaDB [(none)]> GRANT ALL PRIVILEGES ON cinder.* TO 'cinder' @'%' IDENTIFIED BY 'O3bwbp
Query OK, 0 rows affected (0.00 sec)
执行初始化脚本
创建cinder用户 (密码为hf8LX9bow)
1
2
3
4
5
6
7
8
9
10
11
[root@controller ~]
User Password:
Repeat User Password:
+-----------+----------------------------------+
| Field | Value |
+-----------+----------------------------------+
| domain_id | default |
| enabled | True |
| id | d40f3763630e42eea28fbc23d932e1db |
| name | cinder |
+-----------+----------------------------------+
添加admin角色
创建cinder和cinderv2 实例
1
2
3
4
5
6
7
8
9
10
11
[root@controller ~]
> --description "OpenStack Block Storage" volume
+-------------+----------------------------------+
| Field | Value |
+-------------+----------------------------------+
| description | OpenStack Block Storage |
| enabled | True |
| id | 75380a0ca9764ed29f69241b34130173 |
| name | cinder |
| type | volume |
+-------------+----------------------------------+
1
2
3
4
5
6
7
8
9
10
11
[root@controller ~]
> --description "OpenStack Block Storage" volumev2
+-------------+----------------------------------+
| Field | Value |
+-------------+----------------------------------+
| description | OpenStack Block Storage |
| enabled | True |
| id | d680833b65fc446480b6aa4ccf15073b |
| name | cinderv2 |
| type | volumev2 |
+-------------+----------------------------------+
创建块存储服务api终端
1
2
3
4
5
6
7
8
9
10
11
12
13
14
[root@controller ~]
+--------------+-----------------------------------------+
| Field | Value |
+--------------+-----------------------------------------+
| enabled | True |
| id | 12cfa0383a8a474e8dbd04bfeebc0a3f |
| interface | public |
| region | RegionOne |
| region_id | RegionOne |
| service_id | 75380a0ca9764ed29f69241b34130173 |
| service_name | cinder |
| service_type | volume |
| url | http://controller:8776/v1/%(tenant_id)s |
+--------------+-----------------------------------------+
1
2
3
4
5
6
7
8
9
10
11
12
13
14
[root@controller ~]
+--------------+-----------------------------------------+
| Field | Value |
+--------------+-----------------------------------------+
| enabled | True |
| id | 06b12355e6554f4d8228975f4bb58b46 |
| interface | internal |
| region | RegionOne |
| region_id | RegionOne |
| service_id | 75380a0ca9764ed29f69241b34130173 |
| service_name | cinder |
| service_type | volume |
| url | http://controller:8776/v1/%(tenant_id)s |
+--------------+-----------------------------------------+
1
2
3
4
5
6
7
8
9
10
11
12
13
14
[root@controller ~]
+--------------+-----------------------------------------+
| Field | Value |
+--------------+-----------------------------------------+
| enabled | True |
| id | d3dc8b0eba2744d1b2abd79da965b846 |
| interface | admin |
| region | RegionOne |
| region_id | RegionOne |
| service_id | 75380a0ca9764ed29f69241b34130173 |
| service_name | cinder |
| service_type | volume |
| url | http://controller:8776/v1/%(tenant_id)s |
+--------------+-----------------------------------------+
1
2
3
4
5
6
7
8
9
10
11
12
13
14
[root@controller ~]
+--------------+-----------------------------------------+
| Field | Value |
+--------------+-----------------------------------------+
| enabled | True |
| id | f34bbb14772d473b8b6e3e721d03f61a |
| interface | public |
| region | RegionOne |
| region_id | RegionOne |
| service_id | d680833b65fc446480b6aa4ccf15073b |
| service_name | cinderv2 |
| service_type | volumev2 |
| url | http://controller:8776/v2/%(tenant_id)s |
+--------------+-----------------------------------------+
1
2
3
4
5
6
7
8
9
10
11
12
13
14
[root@controller ~]
+--------------+-----------------------------------------+
| Field | Value |
+--------------+-----------------------------------------+
| enabled | True |
| id | e9d91f0776b149869262b0cb8983e12b |
| interface | internal |
| region | RegionOne |
| region_id | RegionOne |
| service_id | d680833b65fc446480b6aa4ccf15073b |
| service_name | cinderv2 |
| service_type | volumev2 |
| url | http://controller:8776/v2/%(tenant_id)s |
+--------------+-----------------------------------------+
1
2
3
4
5
6
7
8
9
10
11
12
13
14
[root@controller ~]
+--------------+-----------------------------------------+
| Field | Value |
+--------------+-----------------------------------------+
| enabled | True |
| id | 73d9a239b47542119256ab8183ba2b77 |
| interface | admin |
| region | RegionOne |
| region_id | RegionOne |
| service_id | d680833b65fc446480b6aa4ccf15073b |
| service_name | cinderv2 |
| service_type | volumev2 |
| url | http://controller:8776/v2/%(tenant_id)s |
+--------------+-----------------------------------------+
增加block storage - 安装和配置 (controller) 安装包
编辑配置文件
更改或增加
1
2
3
4
5
6
7
8
9
10
11
12
13
14
15
16
17
18
19
20
21
22
23
24
25
26
27
[DEFAULT]
rpc_backend = rabbit
auth_strategy = keystone
my_ip = 192.168.1.99
verbose = True
[database]
connection = mysql://cinder:O3bwbpoZ3@controller/cinder
[keystone_authtoken]
auth_uri = http://controller:5000
auth_url = http://controller:35357
auth_plugin = password
project_domain_id = default
user_domain_id = default
project_name = service
username = cinder
password = hf8LX9bow
[oslo_messaging_rabbit]
rabbit_host = controller
rabbit_userid = openstack
rabbit_password = o3NXovnz5
[oslo_concurrency]
lock_path = /var/lib/cinder/tmp
同步数据
配置compute使用块存储
1
2
[cinder]
os_region_name=RegionOne
启动服务
1
2
3
[root@controller ~]
Created symlink from /etc/systemd/system/multi-user.target.wants/openstack-cinder-api.service to /usr/lib/systemd/system/openstack-cinder-api.service.
Created symlink from /etc/systemd/system/multi-user.target.wants/openstack-cinder-scheduler.service to /usr/lib/systemd/system/openstack-cinder-scheduler.service.
增加block storage - 配置storage节点 (compute) 我们理应需要再准备一台单独的机器来做storage服务的,但是为了节省资源,我们就 那compute节点和storage节点共用。这里需要为compute(storage)节点再增加一块磁盘 (/dev/sdb)作为存储磁盘。
安装lvm
启动服务
1
2
[root@compute ~]
Created symlink from /etc/systemd/system/sysinit.target.wants/lvm2-lvmetad.service to /usr/lib/systemd/system/lvm2-lvmetad.service.
创建物理卷
1
2
[root@compute ~]
Physical volume "/dev/sdb" successfully created.
创建卷组
1
2
[root@compute ~]
Volume group "cinder-volumes" successfully created
编辑配置文件
1
2
3
4
devices {
filter = [ "a/sdb/" , "r/.*/" ]
说明: 如果还有第三块磁盘,应该再加上
filter = [ "a/sda/" , "a/sdb/" , "r/.*/" ]
安装包
编辑配置文件
1
2
3
4
5
6
7
8
9
10
11
12
13
14
15
16
17
18
19
20
21
22
23
24
25
26
27
28
29
30
31
32
33
34
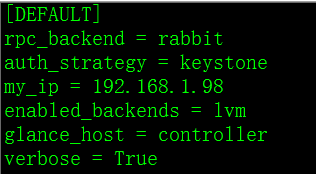
[DEFAULT]
rpc_backend = rabbit
auth_strategy = keystone
my_ip = 192.168.1.98
enabled_backends = lvm
glance_host = controller
verbose = True
[database]
connection = mysql://cinder:O3bwbpoZ3@controller/cinder
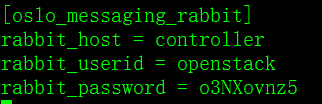
[oslo_messaging_rabbit]
rabbit_host = controller
rabbit_userid = openstack
rabbit_password = o3NXovnz5
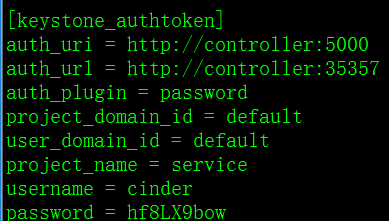
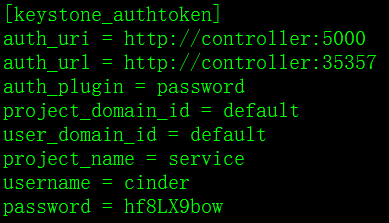
[keystone_authtoken]
auth_uri = http://controller:5000
auth_url = http://controller:35357
auth_plugin = password
project_domain_id = default
user_domain_id = default
project_name = service
username = cinder
password = hf8LX9bow
[lvm]
volume_driver = cinder.volume.drivers.lvm.LVMVolumeDriver
volume_group = cinder-volumes
iscsi_protocol = iscsi
iscsi_helper = lioadm
[oslo_concurrency]
lock_path = /var/lib/cinder/tmp
启动服务 (compute)
1
2
3
[root@compute ~]
Created symlink from /etc/systemd/system/multi-user.target.wants/openstack-cinder-volume.service to /usr/lib/systemd/system/openstack-cinder-volume.service.
Created symlink from /etc/systemd/system/multi-user.target.wants/target.service to /usr/lib/systemd/system/target.service.
验证操作 (controller)
1). 执行初始化脚本
2). 列出服务
15.运行实例 创建公网网络 (controller) 执行初始化脚本
创建网络
1
2
3
4
5
6
7
8
9
10
11
12
13
14
15
16
17
18
19
20
[root@controller ~]
> --provider:network_type flat
Created a new network:
+---------------------------+--------------------------------------+
| Field | Value |
+---------------------------+--------------------------------------+
| admin_state_up | True |
| id | 7685414f-e88f-46e0-b7f3-5867771331bf |
| mtu | 0 |
| name | public |
| port_security_enabled | True |
| provider:network_type | flat |
| provider:physical_network | public |
| provider:segmentation_id | |
| router:external | False |
| shared | True |
| status | ACTIVE |
| subnets | |
| tenant_id | 4b9a26837e5443bc9b35ffa36f97f868 |
+---------------------------+--------------------------------------+
创建子网
1
2
3
4
5
6
7
8
9
10
11
12
13
14
15
16
17
18
19
20
21
22
[root@controller ~]
> --allocation-pool start=192.168.1.10,end=192.168.1.30 \
> --dns-nameserver 61.128.128.68 --gateway 192.168.1.2
Created a new subnet:
+-------------------+--------------------------------------------------+
| Field | Value |
+-------------------+--------------------------------------------------+
| allocation_pools | {"start" : "192.168.1.10" , "end" : "192.168.1.30" } |
| cidr | 192.168.1.0/24 |
| dns_nameservers | 61.128.128.68 |
| enable_dhcp | True |
| gateway_ip | 192.168.1.2 |
| host_routes | |
| id | 201038f1-c327-46b7-ba34-695ea712f742 |
| ip_version | 4 |
| ipv6_address_mode | |
| ipv6_ra_mode | |
| name | public |
| network_id | 7685414f-e88f-46e0-b7f3-5867771331bf |
| subnetpool_id | |
| tenant_id | 4b9a26837e5443bc9b35ffa36f97f868 |
+-------------------+--------------------------------------------------+
说明:这里的公网,实际上是虚拟机用的那个网段,我们暂时把它作为公网,在这里因为涉及到dhcp服务,会和局域网内的路由器上的dhcp服务产生冲突,所以需要先把路由器上的dhcp服务关掉。
创建key (controller) 执行初始化脚本
生成密钥
1
2
[root@controller ~]
Enter file in which to save the key (/root/.ssh/id_rsa):
验证密钥
1
2
3
4
5
6
[root@controller ~]
+-------+-------------------------------------------------+
| Name | Fingerprint |
+-------+-------------------------------------------------+
| mykey | 11:c7:8b:e5:72:9d:13:19:03:46:bf:d8:8d:ef:69:c3 |
+-------+-------------------------------------------------+
增加安全组规则
1
2
3
4
5
6
[root@controller ~]
+-------------+-----------+---------+-----------+--------------+
| IP Protocol | From Port | To Port | IP Range | Source Group |
+-------------+-----------+---------+-----------+--------------+
| icmp | -1 | -1 | 0.0.0.0/0 | |
+-------------+-----------+---------+-----------+--------------+
允许ssh 访问
1
2
3
4
5
6
[root@controller ~]
+-------------+-----------+---------+-----------+--------------+
| IP Protocol | From Port | To Port | IP Range | Source Group |
+-------------+-----------+---------+-----------+--------------+
| tcp | 22 | 22 | 0.0.0.0/0 | |
+-------------+-----------+---------+-----------+--------------+
配置实例选项 (controller) 执行初始化脚本
列出实例类型
1
2
3
4
5
6
7
8
9
[root@controller ~]
+----+-----------+-----------+------+-----------+------+-------+-------------+-----------+
| ID | Name | Memory_MB | Disk | Ephemeral | Swap | VCPUs | RXTX_Factor | Is_Public |
+----+-----------+-----------+------+-----------+------+-------+-------------+-----------+
| 1 | m1.tiny | 512 | 1 | 0 | | 1 | 1.0 | True |
| 2 | m1.small | 2048 | 20 | 0 | | 1 | 1.0 | True |
| 3 | m1.medium | 4096 | 40 | 0 | | 2 | 1.0 | True |
| 4 | m1.large | 8192 | 80 | 0 | | 4 | 1.0 | True |
| 5 | m1.xlarge | 16384 | 160 | 0 | | 8 | 1.0 | True |
列出所有镜像
1
2
3
4
5
6
[root@controller ~]
+--------------------------------------+--------+--------+--------+
| ID | Name | Status | Server |
+--------------------------------------+--------+--------+--------+
| 3b1625d2-9f42-43f3-af8d-3a976c1825f7 | cirros | ACTIVE | |
+--------------------------------------+--------+--------+--------+
列出可用网络
1
2
3
4
5
6
[root@controller ~]
+--------------------------------------+--------+-----------------------------------------------------+
| id | name | subnets |
+--------------------------------------+--------+-----------------------------------------------------+
| 7685414f-e88f-46e0-b7f3-5867771331bf | public | 201038f1-c327-46b7-ba34-695ea712f742 192.168.1.0/24 |
+--------------------------------------+--------+-----------------------------------------------------+
列出安全组
1
2
3
4
5
6
[root@controller ~]
+--------------------------------------+---------+------------------------+
| Id | Name | Description |
+--------------------------------------+---------+------------------------+
| ce571d20-ba6d-4aa5-b752-0181753ca729 | default | Default security group |
+--------------------------------------+---------+------------------------+
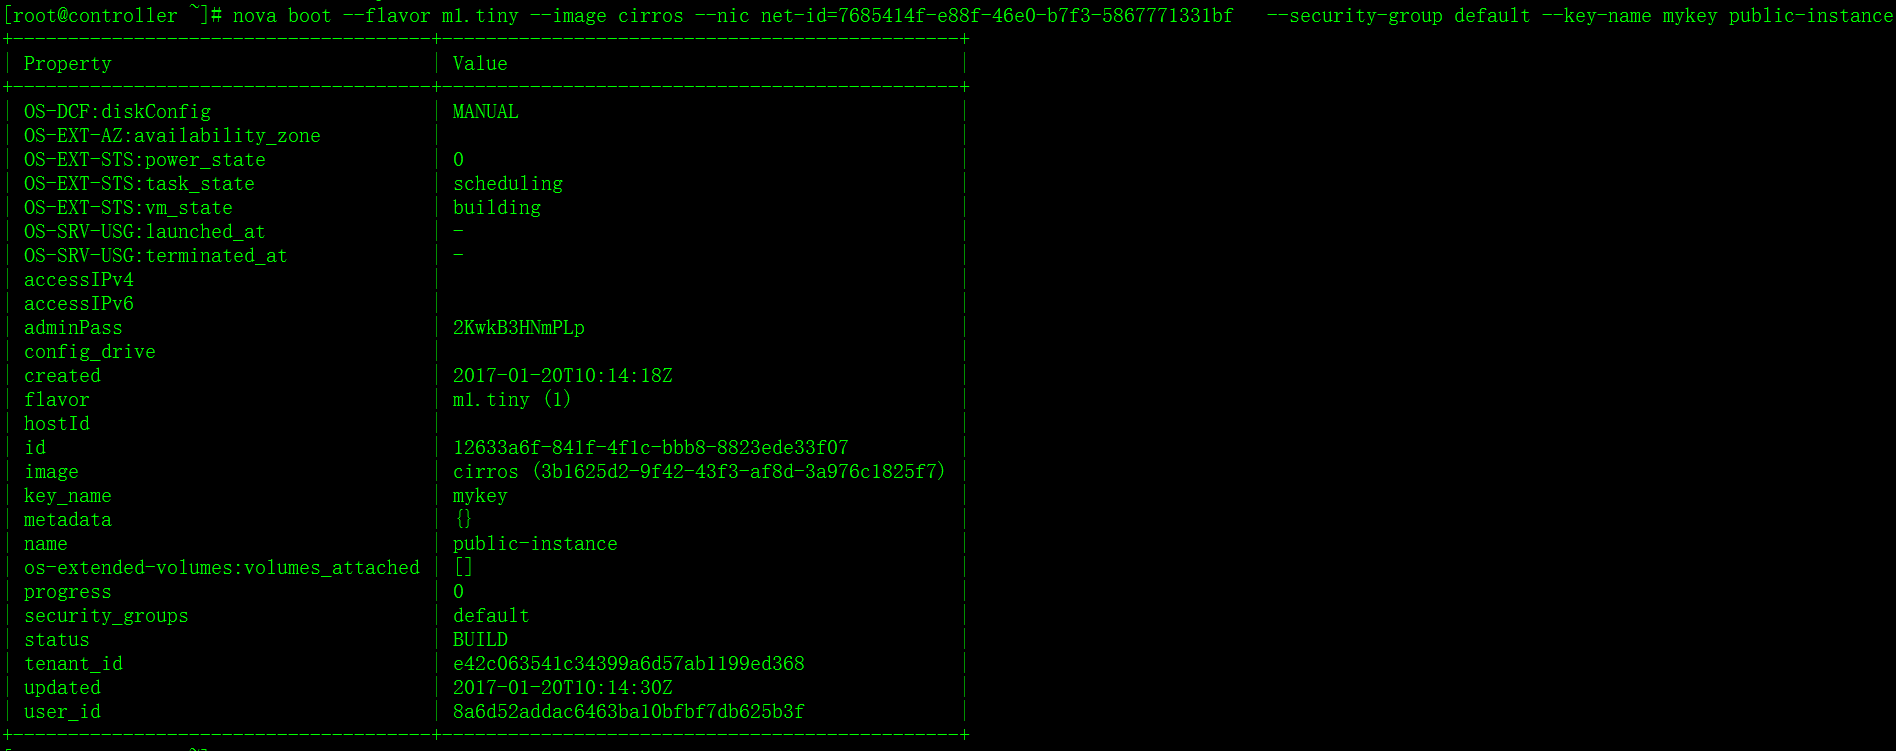
运行实例
nova boot –flavor m1.tiny –image cirros –nic net-id=PUBLIC_NET_ID \
说明:这里的PUBLIC_NET_ID需要替换为可用网络里面public网络的id
检测实例状态
1
2
3
4
5
6
[root@controller ~]
+--------------------------------------+-----------------+--------+------------+-------------+---------------------+
| ID | Name | Status | Task State | Power State | Networks |
+--------------------------------------+-----------------+--------+------------+-------------+---------------------+
| 12633a6f-841f-4f1c-bbb8-8823ede33f07 | public-instance | ACTIVE | - | Running | public=192.168.1.11 |
+--------------------------------------+-----------------+--------+------------+-------------+---------------------+
连接实例 (controller) 使用vnc连接(使用下面命令可以列出vnc的连接)
1
2
3
4
5
6
[root@controller ~]
+-------+---------------------------------------------------------------------------------+
| Type | Url |
+-------+---------------------------------------------------------------------------------+
| novnc | http://controller:6080/vnc_auto.html?token=e30b64d1-b322-4760-8c56-a38bc9109b9d |
+-------+---------------------------------------------------------------------------------+
验证网络(在实例里面)
ping -c 4 192.168.1.2
远程连接实例
首先用nova list 查看实例的ip(假如为192.168.1.11)
验证ip
ping -c4 192.168.16.11
远程ssh登录
16.给实例增加云盘 增加云盘 (controller) 先执行初始化脚本
创建一个2G的云盘,名字为volume1
1
2
3
4
5
6
7
8
9
10
11
12
13
14
15
16
17
18
19
20
21
22
23
24
25
26
[root@controller ~]
+---------------------------------------+--------------------------------------+
| Property | Value |
+---------------------------------------+--------------------------------------+
| attachments | [] |
| availability_zone | nova |
| bootable | false |
| consistencygroup_id | None |
| created_at | 2017-01-20T10:32:05.000000 |
| description | None |
| encrypted | False |
| id | fddd495f-448b-4133-a7d0-4a1970aa57ad |
| metadata | {} |
| multiattach | False |
| name | volume1 |
| os-vol-tenant-attr:tenant_id | e42c063541c34399a6d57ab1199ed368 |
| os-volume-replication:driver_data | None |
| os-volume-replication:extended_status | None |
| replication_status | disabled |
| size | 2 |
| snapshot_id | None |
| source_volid | None |
| status | creating |
| user_id | 8a6d52addac6463ba10bfbf7db625b3f |
| volume_type | None |
+---------------------------------------+--------------------------------------+
列出所有云盘
1
2
3
4
5
6
[root@controller ~]
+--------------------------------------+-----------+---------+------+-------------+----------+-------------+-------------+
| ID | Status | Name | Size | Volume Type | Bootable | Multiattach | Attached to |
+--------------------------------------+-----------+---------+------+-------------+----------+-------------+-------------+
| fddd495f-448b-4133-a7d0-4a1970aa57ad | available | volume1 | 2 | - | false | False | |
+--------------------------------------+-----------+---------+------+-------------+----------+-------------+-------------+
把云盘挂到实例中
nova volume-attach INSTANCE_NAME VOLUME_ID
1
2
3
4
5
6
7
8
9
[root@controller ~]
+----------+--------------------------------------+
| Property | Value |
+----------+--------------------------------------+
| device | /dev/vdb |
| id | fddd495f-448b-4133-a7d0-4a1970aa57ad |
| serverId | 12633a6f-841f-4f1c-bbb8-8823ede33f07 |
| volumeId | fddd495f-448b-4133-a7d0-4a1970aa57ad |
+----------+--------------------------------------+
说明:INSTACE_NAME可以用nova list查看,VOLUME_ID就是用cinder list查看到的云盘id
列出已经挂上的云盘
1
2
3
4
5
6
7
[root@controller ~]
WARNING: Command volume-list is deprecated and will be removed after Nova 13.0.0 is released. Use python-cinderclient or openstackclient instead.
+--------------------------------------+--------+--------------+------+-------------+--------------------------------------+
| ID | Status | Display Name | Size | Volume Type | Attached to |
+--------------------------------------+--------+--------------+------+-------------+--------------------------------------+
| fddd495f-448b-4133-a7d0-4a1970aa57ad | in -use | volume1 | 2 | - | 12633a6f-841f-4f1c-bbb8-8823ede33f07 |
+--------------------------------------+--------+--------------+------+-------------+--------------------------------------+
然后登陆到实例
1
2
3
[root@controller ~]
cirros@192.168.1.11's password:
$
查看云盘
1
2
3
4
5
6
7
8
9
10
11
12
13
14
15
16
17
18
19
20
$ sudo fdisk -l
Disk /dev/vda: 1073 MB, 1073741824 bytes
255 heads, 63 sectors/track, 130 cylinders, total 2097152 sectors
Units = sectors of 1 * 512 = 512 bytes
Sector size (logical/physical): 512 bytes / 512 bytes
I/O size (minimum/optimal): 512 bytes / 512 bytes
Disk identifier: 0x00000000
Device Boot Start End Blocks Id System
/dev/vda1 * 16065 2088449 1036192+ 83 Linux
Disk /dev/vdb: 2147 MB, 2147483648 bytes
16 heads, 63 sectors/track, 4161 cylinders, total 4194304 sectors
Units = sectors of 1 * 512 = 512 bytes
Sector size (logical/physical): 512 bytes / 512 bytes
I/O size (minimum/optimal): 512 bytes / 512 bytes
Disk identifier: 0x00000000
Disk /dev/vdb doesn't contain a valid partition table